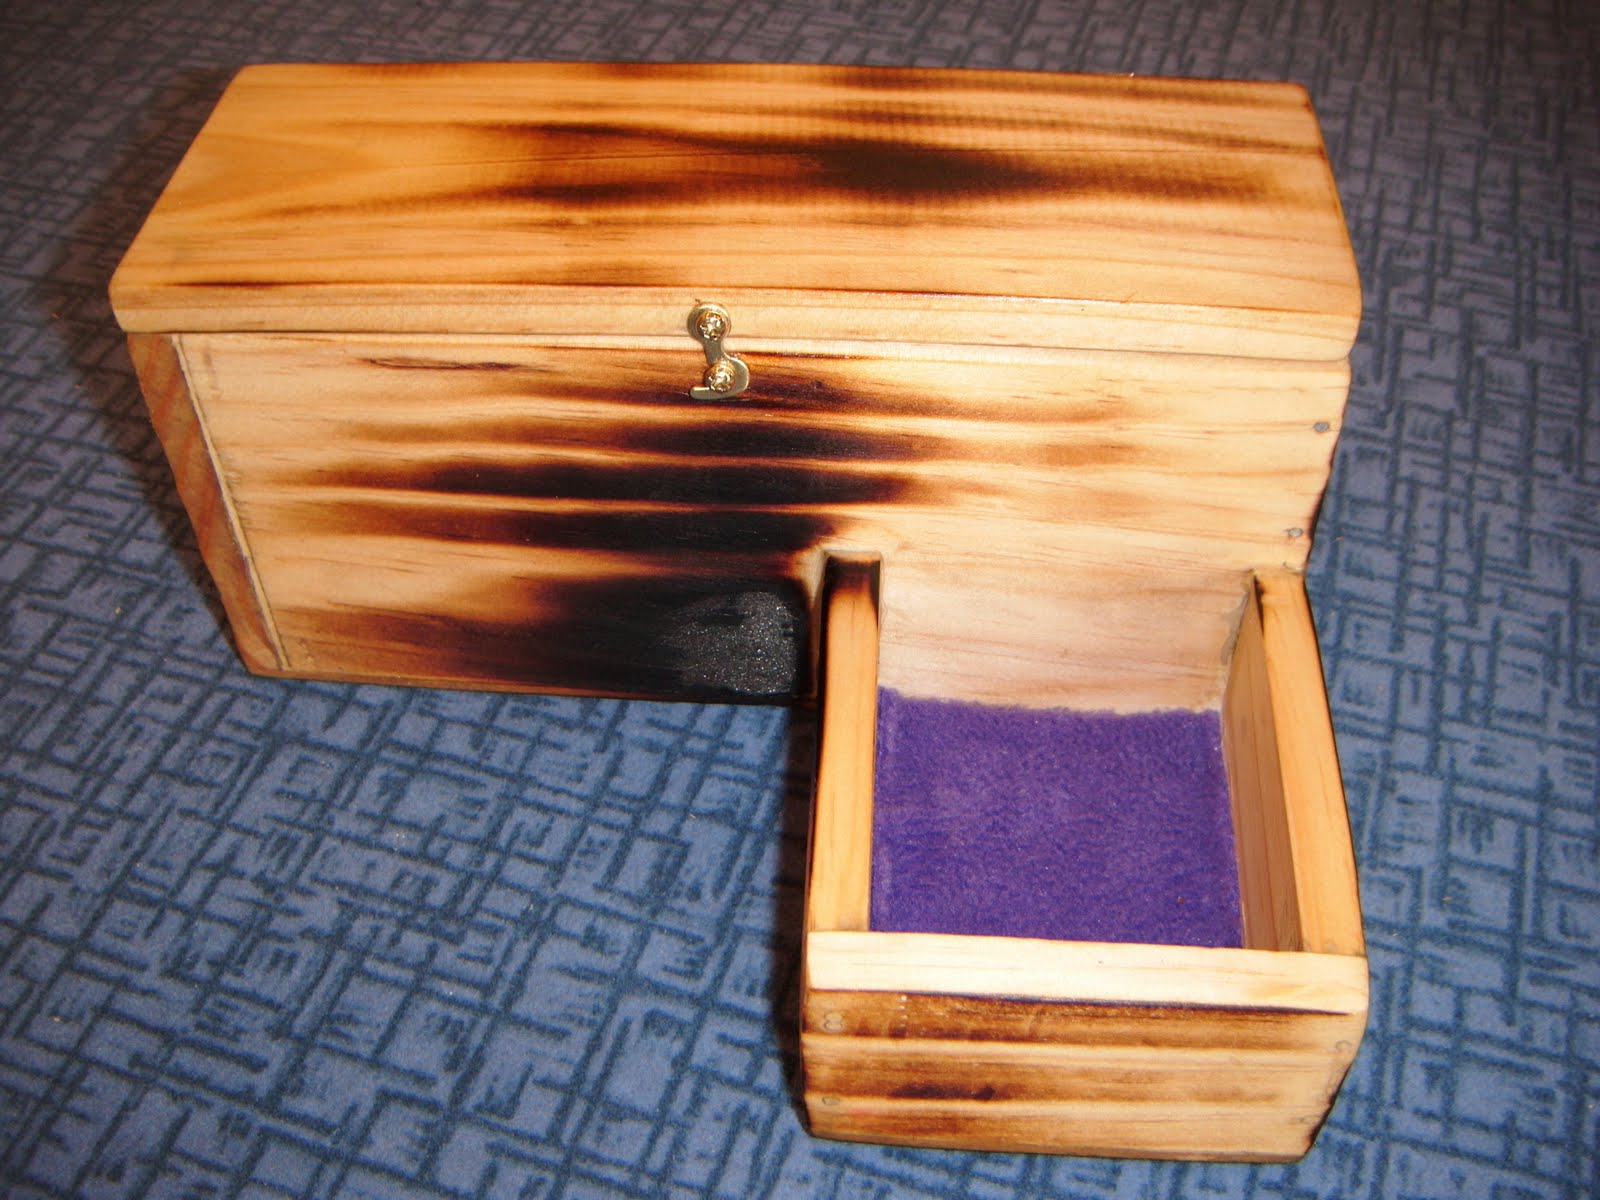
Last term I started my Tidy It box.
I made it so I could keep my office tidy and organised and so far it is working well!
My box was quite hard to cut the correct measurements and adding the compartment on the front was hard too but I use it a lot now.
When I burnt my box I burnt it a bit too much so now the front is like charcoal.
My box also has hinges and a latch to keep the lid closed.
I used a linseed oil finish so it shows the grain better.
I used polar-fleece in the bottom of my compartments.
Over all I'm really happy with my box and i'm sure I will use it heaps!
TORI
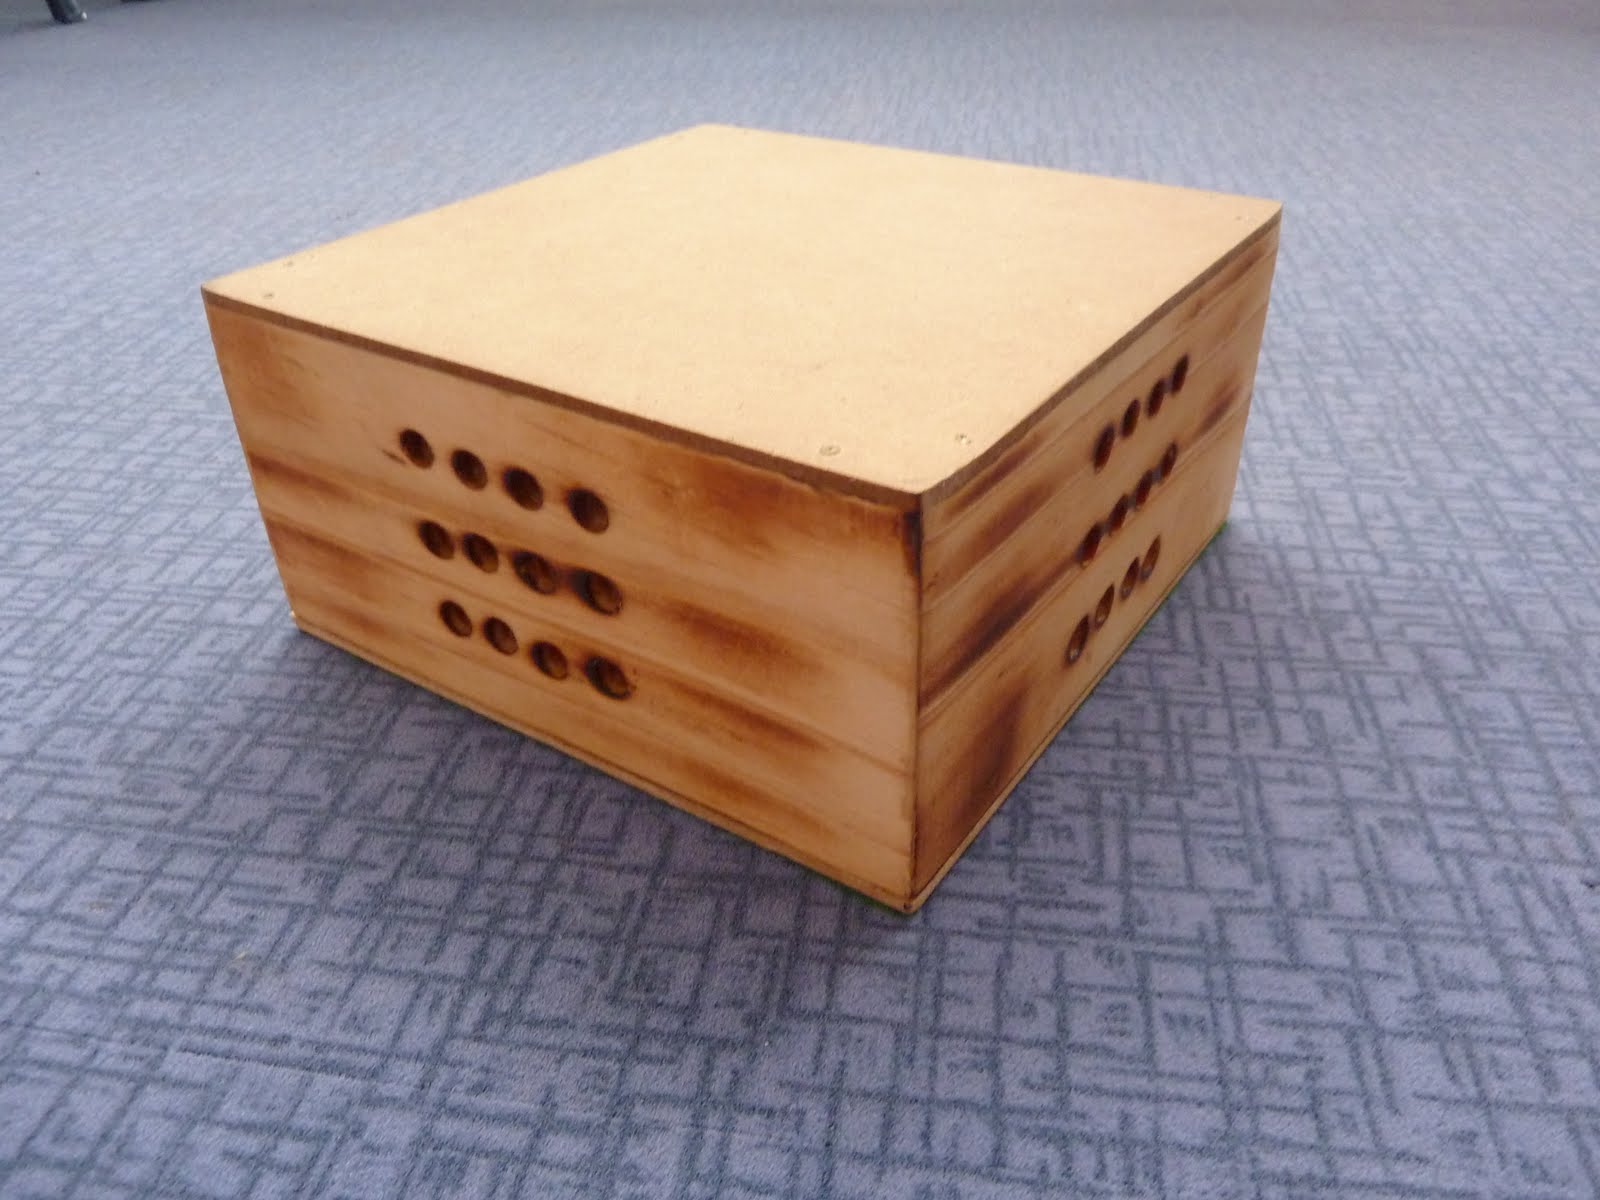
Last term I did my Tidy It unit.
We had to make a box using pine and MDF. I made a box measuring 200x200x90mm with MDF 'bottoms' on both the top and bottom. There are 12 drill holes in each of the sides just big enough for a pencil to fit in. I glued a solid block of wood in the middle so the pencils wont be pushed right through. I added a felt bottom so the bottom wont scratch the surface its sitting on. I finished my box by burning it and then oiling it with linseed oil.
Thats the description of my box. Now the story of how I got there.
My brief was 'create a storage container to hold all my dads pens and pencils in because they are always scattered all over his desk'. When we drew our container plans I had multiple designs and changes to get to the final design. I also found out that the more you sand the better it look and always to sand with the wood grain.
Over all I am pleased with my final product and it looks great the only problem is it very big when the pencils were in place. So I don't think it will be used for what it was created for more likely to be used for as a decoration! By Karene
T.B.C.S
By Karene
T.B.C.S
My box is going to be used for storing my pencils at school. It makes a lot of difference at school because now I'm more organised. I used oil for my finishing touch, but I had no compartments. The work at first seemed like this would take forever, but when I actually set my mind to the task it seemed a little shorter. It was as if we did more paper work at first then actually making the box. Once we finished doing all the paper work we could get straight into making our boxes. At first I needed a lot of help, but then after a little encouragement I was on my way. I was glad about my positioning of my hinges, and I thought they were done properly. Also the polar fleece made the box look really attractive But I got really annoyed about sawing all of my wood.
Tui, Tasman Bay Christian School
In Tidy It I made a box for my DS. It is long and has 2 partitions for the games . I oiled it a little bit so it looks like natural wood. The box is so I don't lose my DS. I am pleased with my box. It is neat because I did nice sanding to make it nice and smooth and I didn't rush. The lid is bigger then the box so it makes the box look much bigger .